Website Verification Help
Here are step-by-step instructions on how to verify your website using a Site Verification Plugin.
**Please note: This is specific to domains hosted on WordPress.
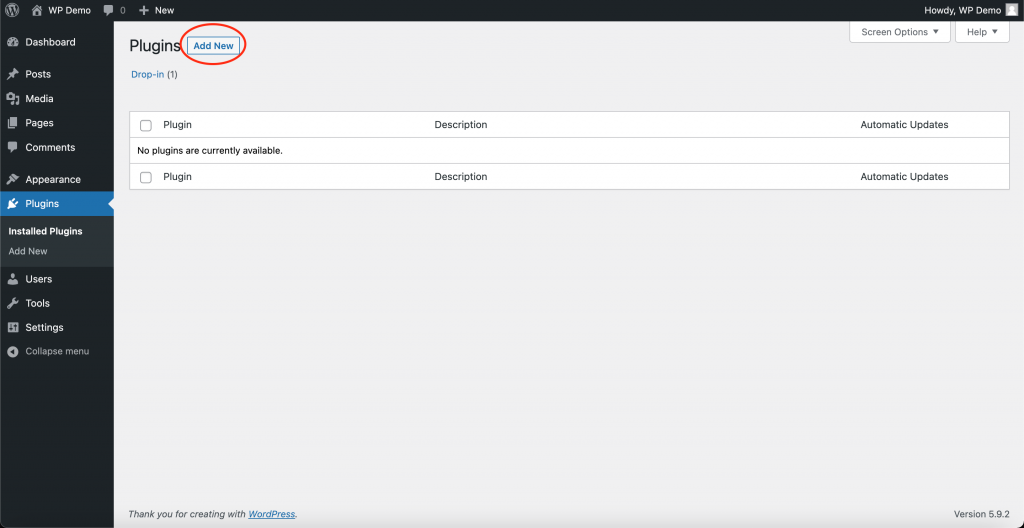
Step 1: Login and navigate to the “Plugins” section on the left-hand menu. Click “Add New“:
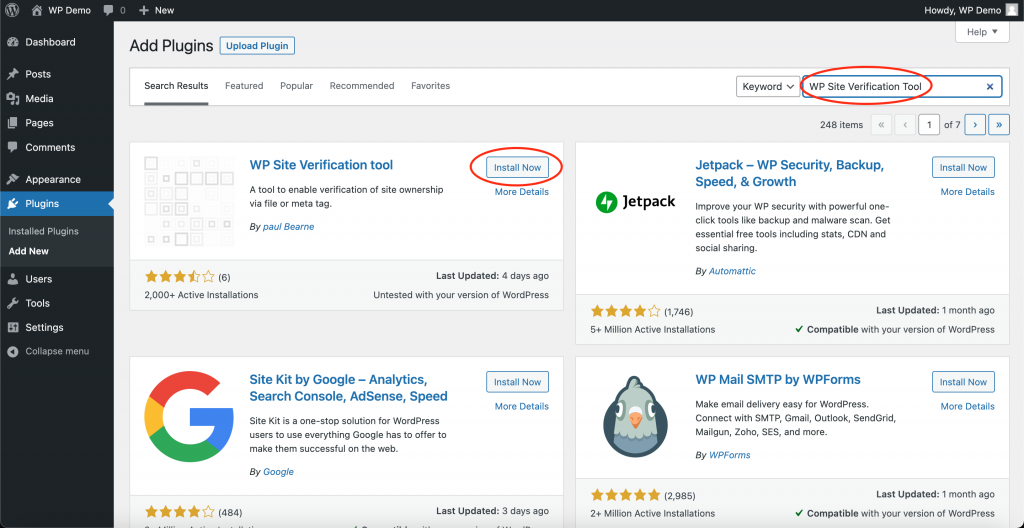
Step 2: Search “WP Site Verification Tool” in the search bar. It should be the first one that comes up; click “Install Now“.
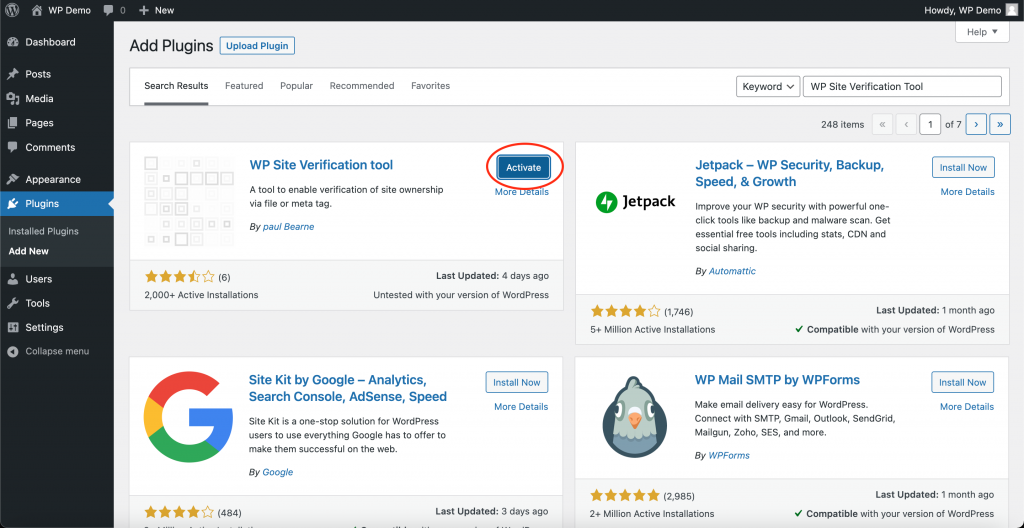
Step 3: Once the plugin is installed, click “Activate”.
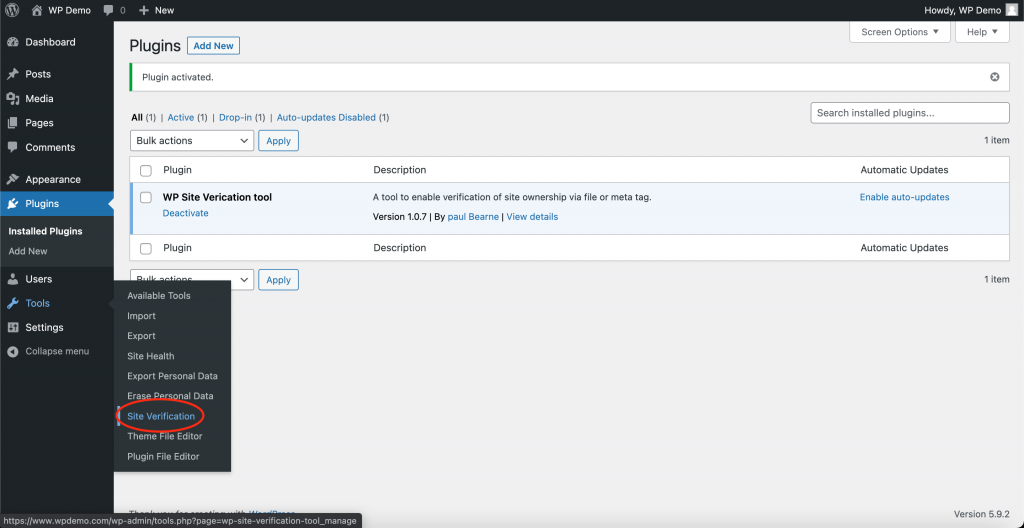
You should now see the Site Verification Tool under your Plugins section.
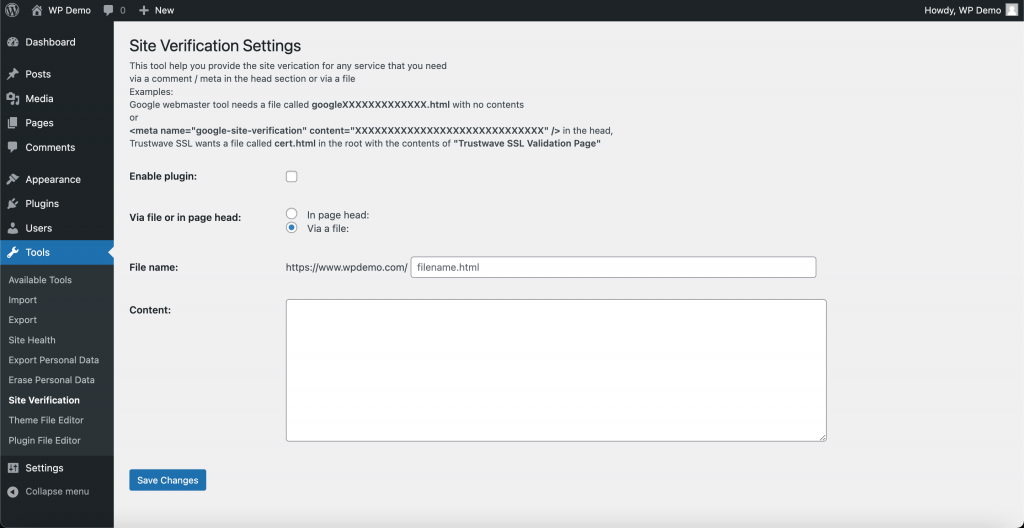
Step 4: Hover over your “tools” section and select “Site Verification” from the dropdown.
This will bring you to the Site Verification Settings page.
Step 5: Confirm “Via a file:” is selected and add the unique file you downloaded from ContentManager.io. Click “Save Changes“.
You can now verify your domain on the Sites page in ContentManager.io! Once the site is verified, you can remove the file and plugin, if desired.

